|


Business Inquiry
Minimum
$1000 Order and
Quantity >10
Inviting Plumbers
and Contractors
|
|
Installation of Reverse Osmosis System
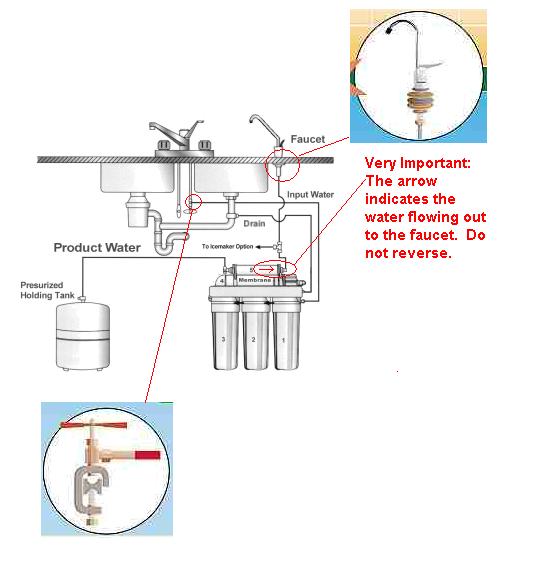 |
Installation Procedure
Summary
The system is pre-assembled already.
All component are provided. All you need to do is hook up three
lines:
1) Faucet installation and faucet line.
2) Drain line using the drain clamp.
3) Input water line using the saddle valve.
A typical installation for an experienced installer will take about 1
hour.How to know
if the system is installed correctly?
Close the water tank and open the drinking
water faucet, there should be almost continuous drip of water or broken
needle stream of water coming out.
Preparing the water system for drinking.
It takes 3-5 hours for the water tank to
fill up.
After installing, you need to fill up the tank 3 and then open the
drinking water faucet to empty the tank. Repeat this process 2
more times.
Now the water is ready for drinking.
|
| |
|
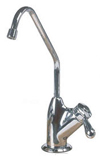
Installing the Faucet Line
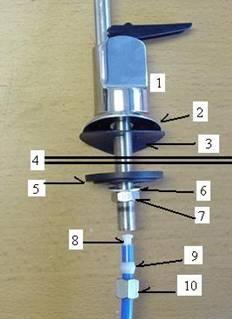 |
Typical Diagram and Instruction:
Drill a 1/2" hole and insert the pieces as shown. (Some faucet
does not need #8 INSERT piece)
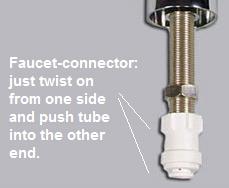
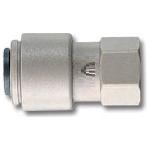
Some systems come with the quick connect to
attach the line to the faucet.
  |
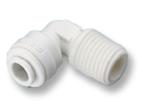
Installing Drain Clamp
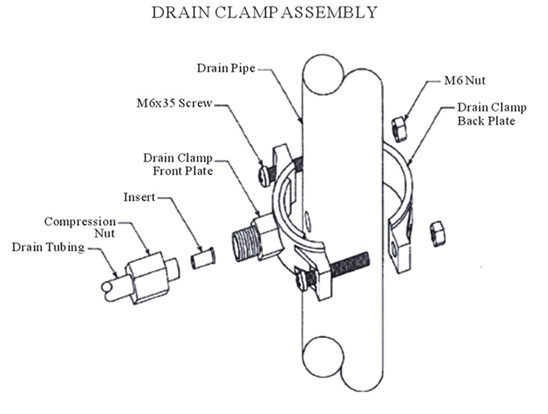 |
The drain clamp must be installed above the
U-trap of the drain for sanitization requirement. Steps:
1) Put drain clamp onto the pipe as shown and tighten the screw.
2) Unscrew the black nut.
3) Drill a hole into the drain pipe following the hole of the clamp.
4) Then insert the drain tubing as shown in the diagram. (Some
does not need the INSERT piece as shown)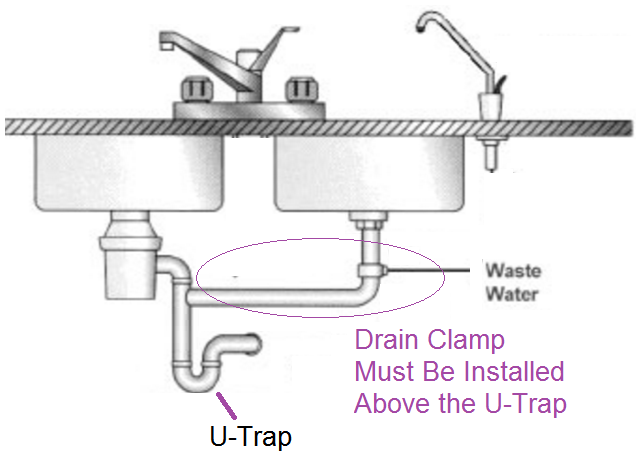 |
Installing Input Water Line
Using the Saddle Valve
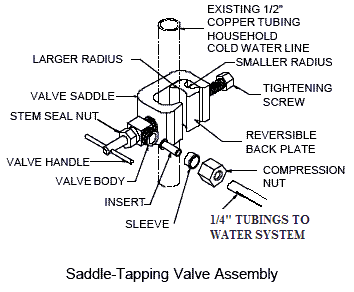 |
Installation / procedure
1) Turn valve handle all the way in and take notice how far the needle
comes out.
*** then reverse the valve handle, until the needle is not shown
(hidden). This way the needle will not scratch the cold water copper
tube when installing. ***
2) Place the saddle valve on the cold water pipe as shown.
3) Tighten the screw using good pressure. But not so much pressure such
that it will break the copper or pvc pipe.
4) Insert the 1/4" tubing as shown.
5) Completely install the other components of the system; hooking up the
faucet, tank and drain line.6) Now you
can start the water. Turn the valve handle until the needle goes
into the copper pipe. Then reverse the needle until it comes back out,
and you will hear the running water. |
|
|
|